Quick Start
This guide is the minimum path for the free package (OpenStreetMap + draw fence, no GIS API key). For full requirements and optional API setup, see Requirements and Configuration.
Before you begin
Section titled “Before you begin”Review Requirements: supported Lightning surfaces, report location columns, and the ~2,000 row limit per report refresh.
1. Install the managed package
Section titled “1. Install the managed package”Install Three Levers Core (namespace three_levers) using the link for your org type:
| Org | Install link |
|---|---|
| Production | Loading install links… |
| Sandbox | Loading install links… |
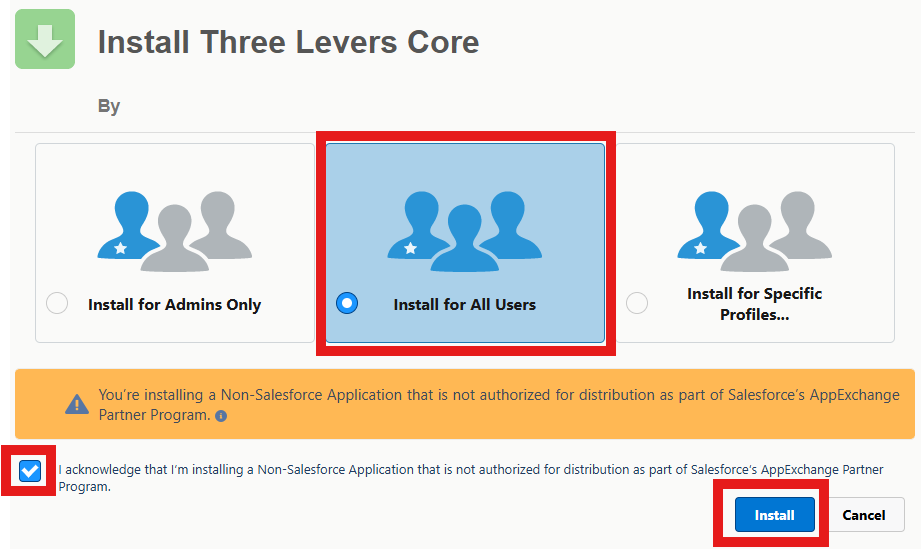
On the Install Three Levers GIS screen:
- Select Install for All Users.
- Check I acknowledge that you are installing a non-Salesforce application (required).
- Click Install.
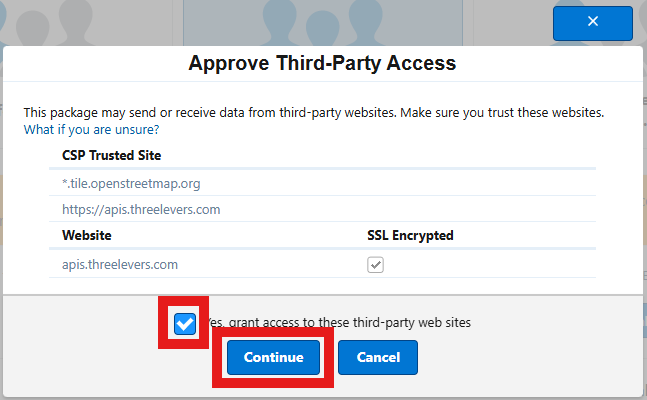
When prompted with Approve Third-Party Access:
- Review the CSP trusted sites (OpenStreetMap tiles and
apis.threelevers.com). - Check Yes, grant access to these third-party web sites.
- Click Continue.
Assign a permission set (or use profiles) so users can open the map page. When using the GIS API, also create a permission set with External Credential Principal access—see GIS API Authentication.
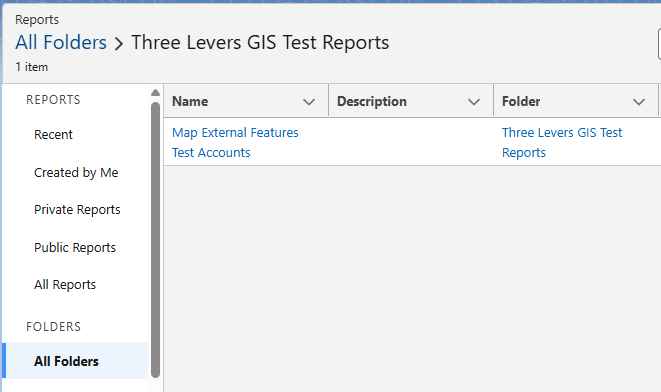
2. Open the sample report
Section titled “2. Open the sample report”The package includes a sample report folder for smoke testing.
- In Salesforce, go to Reports.
- Open All Folders → Three Levers GIS Test Reports.
- Open Map External Features Test Accounts.
- Adjust the report filters so the rows you want on the map are included, then run the report.
For your own production use, you will point the component at your report instead of this sample.
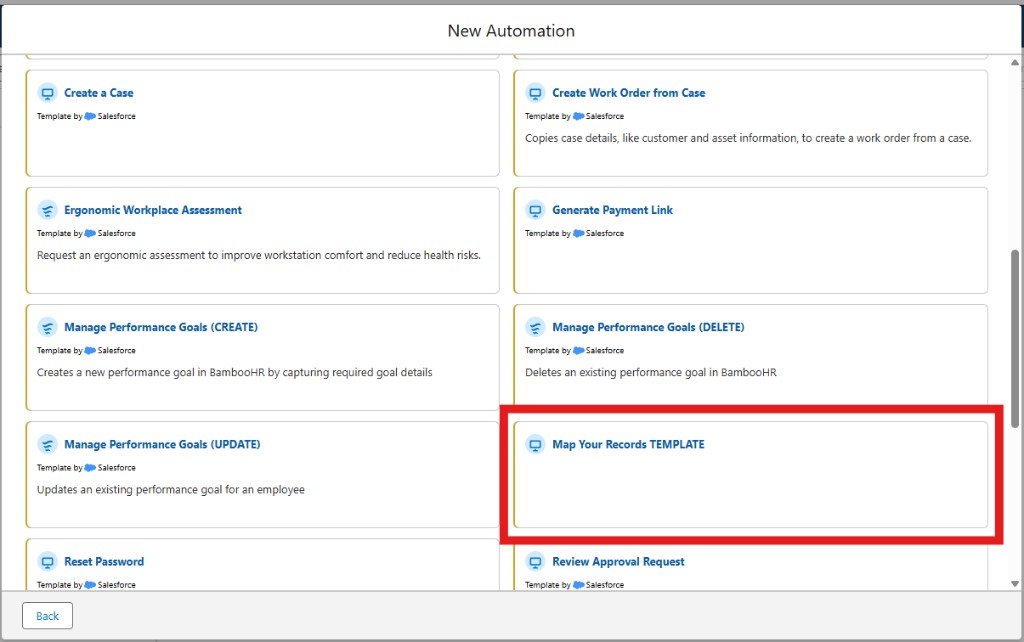
3. Create a Flow from the template
Section titled “3. Create a Flow from the template”- Open Flows and click New Flow.
- Under Categories, open Screen Automations (or choose Screen Flow under Frequently Used).
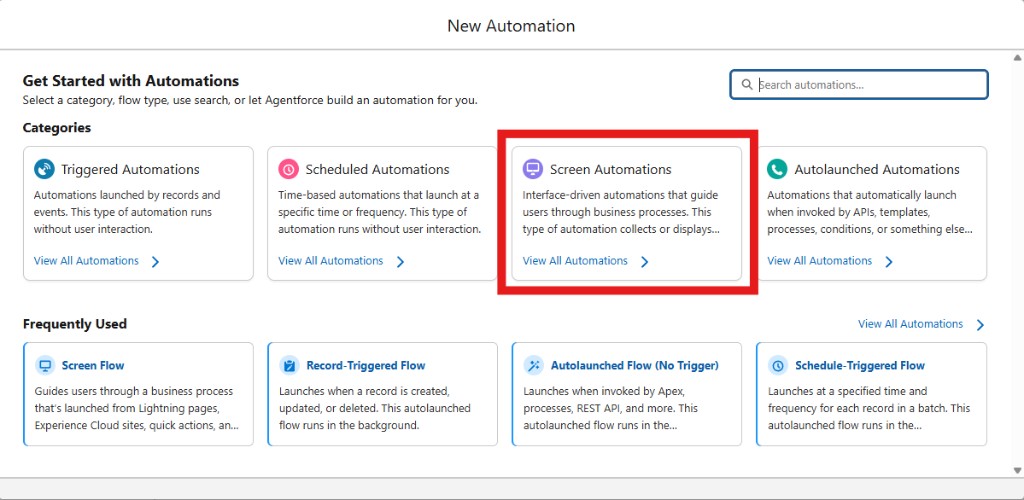
- Select the template Map Your Records TEMPLATE (included with the package).
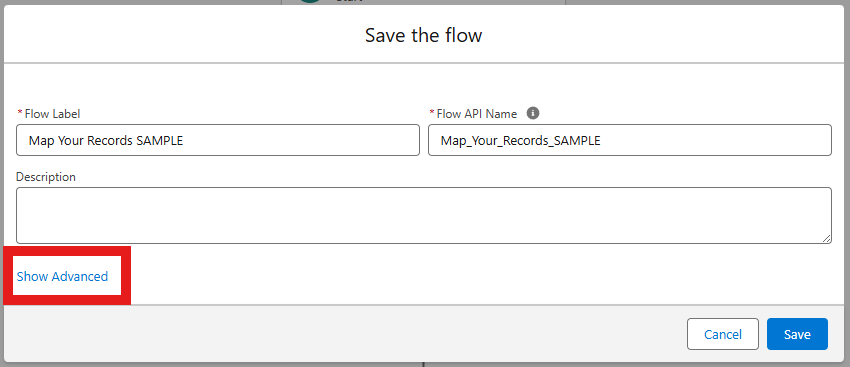
- On Save the flow, enter a Flow Label and Flow API Name (for example
Map Your Records SAMPLE/Map_Your_Records_SAMPLE). - Click Show Advanced and confirm Source Template is Map Your Records TEMPLATE and Type is Screen Flow.
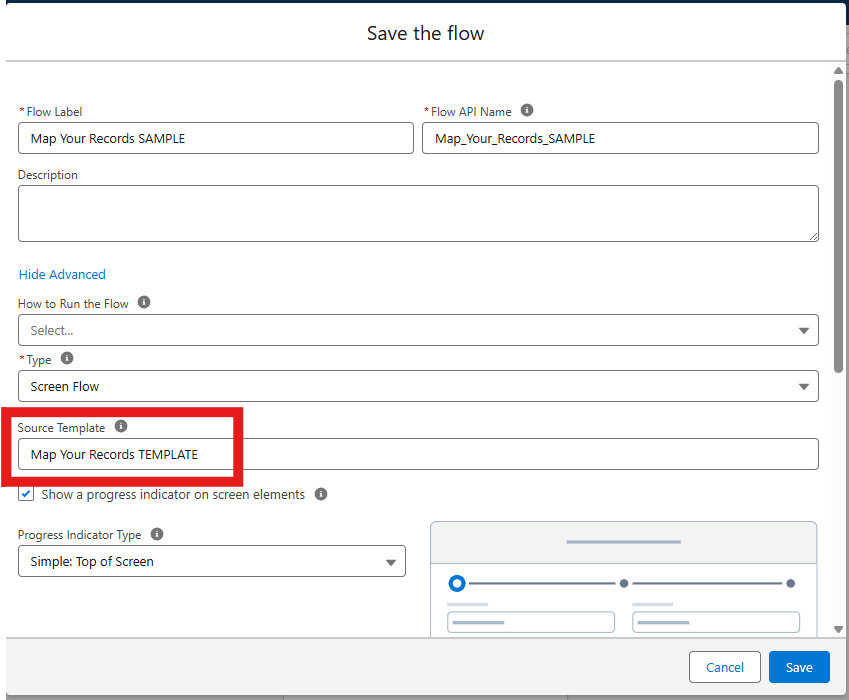
- Click Save, then Activate the Flow. You will select this Flow API name in the map configuration.
See Flow integration for inIds, outIds, nearIds, and String to Collection.
4. Clone the sample Lightning page
Section titled “4. Clone the sample Lightning page”- Open Lightning App Builder.
- Find the sample page Map Records and Take Action (shipped with the package).
- Use Clone so you have your own copy to edit.
- Save and Active your new page.
5. Configure the map on the page
Section titled “5. Configure the map on the page”From the App Launcher, open your cloned page and begin configuration on the live map preview.
- Report — Select Map External Features Test Accounts (or your report).
- Geolocation — Choose Report Fields (latitude/longitude columns) or Address Fields (geocoded addresses). The map preview should show your records.
- Select the Configure gear on the map preview (lightning icon).
In the configuration dialog:
| Setting | Value |
|---|---|
| Id column | Account ID (or the column that holds Salesforce record Ids) |
| Flow | The Flow you created from Map Your Records TEMPLATE (for example Map_Your_Records_SAMPLE) |
| Near distance | Miles for the NEAR band (for example 5) |
- Select Copy JSON, then Edit Page.
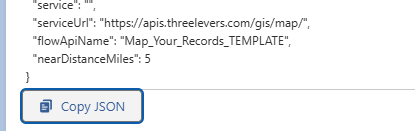
The copied JSON includes your report id, flow name, near distance, and (when unused) empty service for free mode:
{ "service": "", "serviceUrl": "https://apis.threelevers.com/gis/map/", "flowApiName": "Map_Your_Records_SAMPLE", "nearDistanceMiles": 5}6. Paste JSON in App Builder
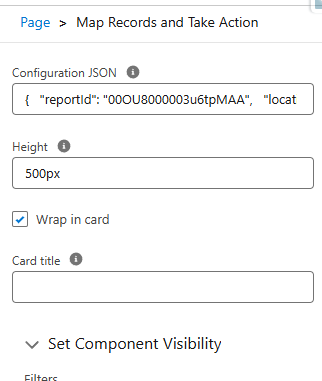
Section titled “6. Paste JSON in App Builder”With the component still selected in App Builder:
- Paste the copied JSON into Configuration JSON.
- Set Height as needed (for example
500px). - Optionally adjust Wrap in card and Card title.
7. Save and activate
Section titled “7. Save and activate”- Save the page.
- Activate the page and assign it to the appropriate app, profile, or Lightning Experience navigation.
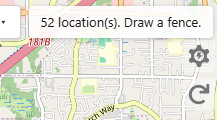
Open the page in your app. You should see report markers on the map. Use Draw fence to select an area, review IN / OUTSIDE / NEAR counts, then Send to Flow to pass record Ids into your Flow.
Next steps
Section titled “Next steps”| Topic | Page |
|---|---|
| Draw fence and selection | Using the map (after §7) |
| IN / OUT / NEAR | IN / OUT / NEAR |
| Flow variables | Flow integration (§3) |
| Hosted boundaries (paid) | Three Levers GIS API (Salesforce setup Step 7) |
| Install, report, page setup | Installation · Configuration |
Stuck? Contact support.